From time to time, many people have a need to take a screenshot of a smartphone or tablet. But not everyone knows how to do it on different Android units, and what you need for this. The situation is further complicated by the fact that various models of devices do this in different ways.
Ways to create a screenshot
It is worth noting that you can take a screenshot of the display in two ways:
- Built-in tools.
- Using a third-party application.
Both options work fine but there are some features. So, let’s look at them in more detail.
You may also like: How to hide apps on Android (Simple way)
Applications for snapshot display
Immediately warn that most of these applications require administrator rights (Root). If you are an experienced user, you know what is going on. Otherwise, it’s better not to open Root because there is a risk of damaging the operating system.
Imagine that you have administrator rights. Now it remains to install the corresponding application.
There are many such programs. The most popular are:
- Screenshot Ultimate.
- ShootMe.
- Screenshot it.

The second program in the list is different in that you can take a screenshot on Android by simply shaking the device. That is, an accelerometer is used. This is very convenient.
All these applications are easy to find in the Play Market. It is noteworthy that they all have a fairly simple and intuitive interface so that absolutely everyone can understand them.
Built-in tools
Every smartphone and tablet based on Android has built-in tools for taking a screenshot. To do this, you just need to know the key combination that you want to hold down for 3-5 seconds.
For example, to take a screenshot on Android 4.4 on the Samsung Galaxy S4, you need to press and hold the power key and the mechanical “Home” button. Hold them for about 2-3 seconds.
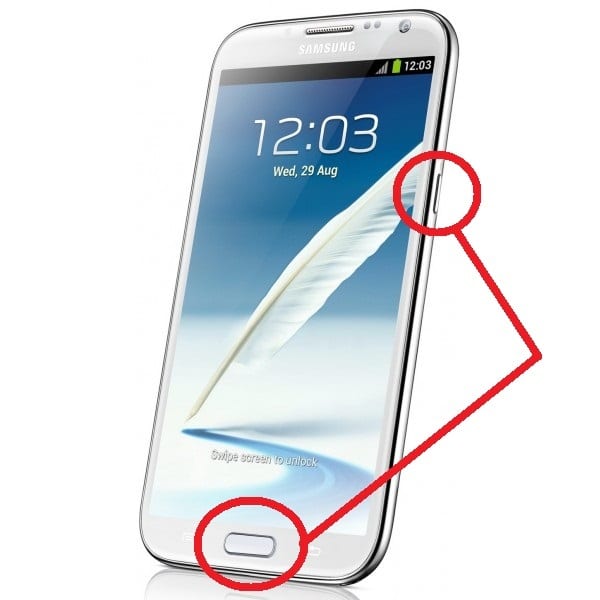
The resulting image can be found in the memory of the gadget. To do this, find the “Pictures” folder. In it, you will find a directory called “Screenshots”. Here all the screenshots are saved. It is worth noting that, unlike the first method, in this case, we do not need Root rights.
Key Combinations
As already mentioned above, the key combination may differ for various models of smartphones/tablets.
As a rule, on the vast majority of devices on the Android 4+ platform, you can remove the screen by pressing the “Volume Down” key + power button (on/off).
But there are other combinations:
- On older versions of Samsung smartphones with Android 2.3, in order to take a screenshot of the display, you just need to press the mechanical buttons “Home” (home) + “Back”.
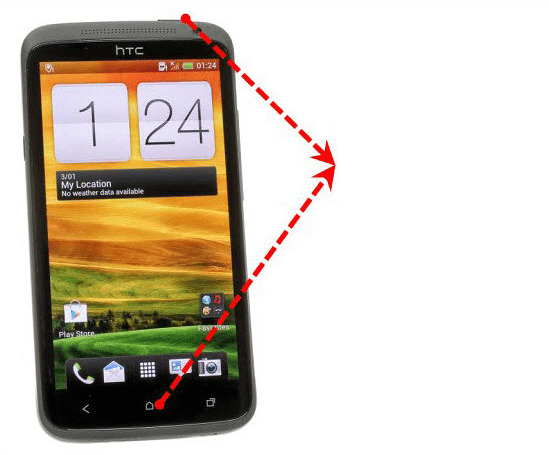
- On devices from HTC, usually a screenshot is done by simultaneously pressing the power button and the mechanical key “Home”. After that, the made photo is saved in the “Photos” directory in the internal memory of the gadget.
- On smartphones and tablets from Sony with Android OS, you can make a screen by simultaneously pressing the volume down and turning on the device.
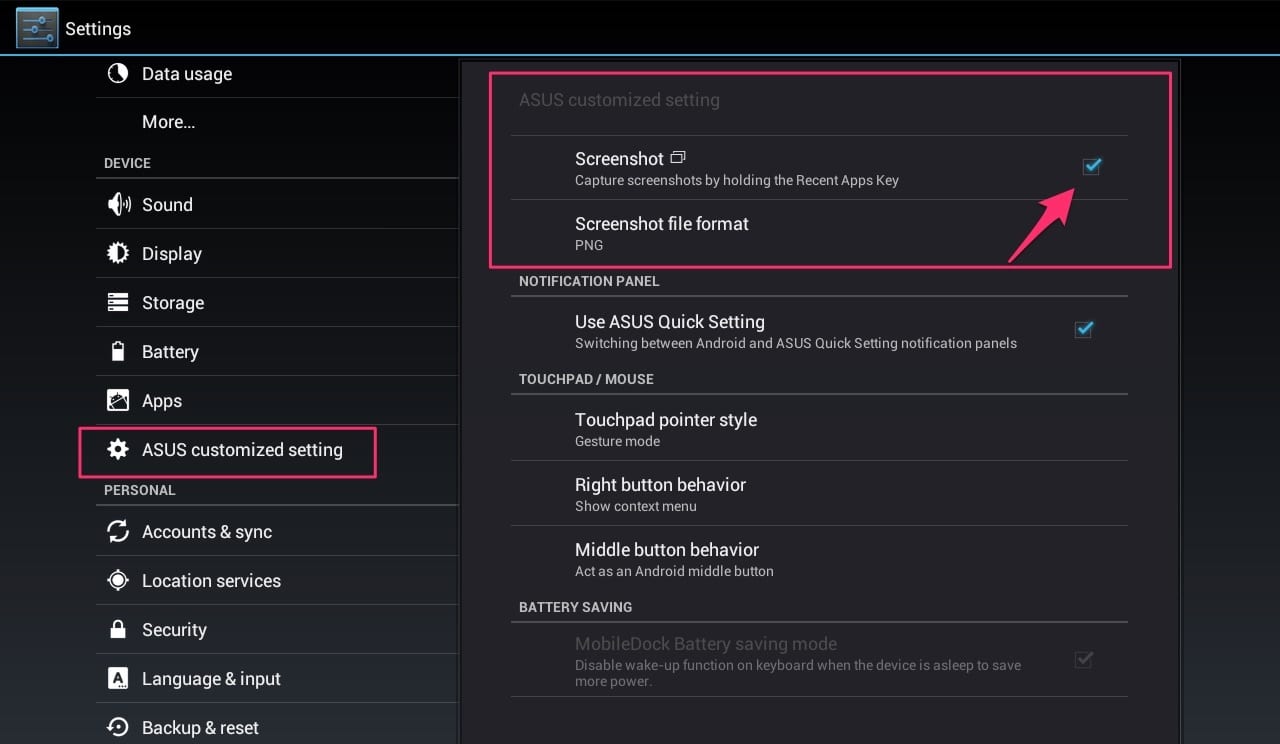
- The most difficult are gadgets from ASUS. First, you will have to enter the settings. Then select “Screen”. Here you need to tick the “Screenshot” section. After that, it remains to hold down the button “Last running applications” for 2-3 seconds (until the characteristic sound).
These are all possible combinations of buttons for gadgets on the Android platform. If you can not get one combination, then try another one. This way you will find the treasured buttons.
Now you know how to make screenshots on Android devices. Problems with this should not arise since there is nothing complicated in this. In any case, even if for some reason you do not have the desire or ability to use these combinations, then there are a lot of applications that simplify this procedure. By the way, not all of them require Root rights and can be either paid or free.